

I previous post where deployed .NET core application in docker container on Raspberry Pi 4. That article contains setting up raspberry pi 4 for .net core and docker. Deployment process was completely manual. We have to manually build container image, push to docker hub. Manually login to raspberry pi and pull image and deploy manually. In this article we will create build and release pipeline. As soon as code checks in, Azure devOps will trigger build and push the new image to Docker hub and trigger release pipeline to pull the image on my raspberry pi and deploy a docker container.
In the last article we create testwebapp. Same application I uploaded to Azure repository. We will begin from there.
Create Build Pipeline
Expectation here is that as soon as user check in the code, I want to start the build and push Image to Docker Hub. This is very simple pipeline and as single developer I want push every change I make to deployment. This is not an actual practice. Below are the steps to create Build Pipeline.
- Click on Pipeline from left menu and click on New Pipeline.

- Select code location. I our case it is Azure Repos Git
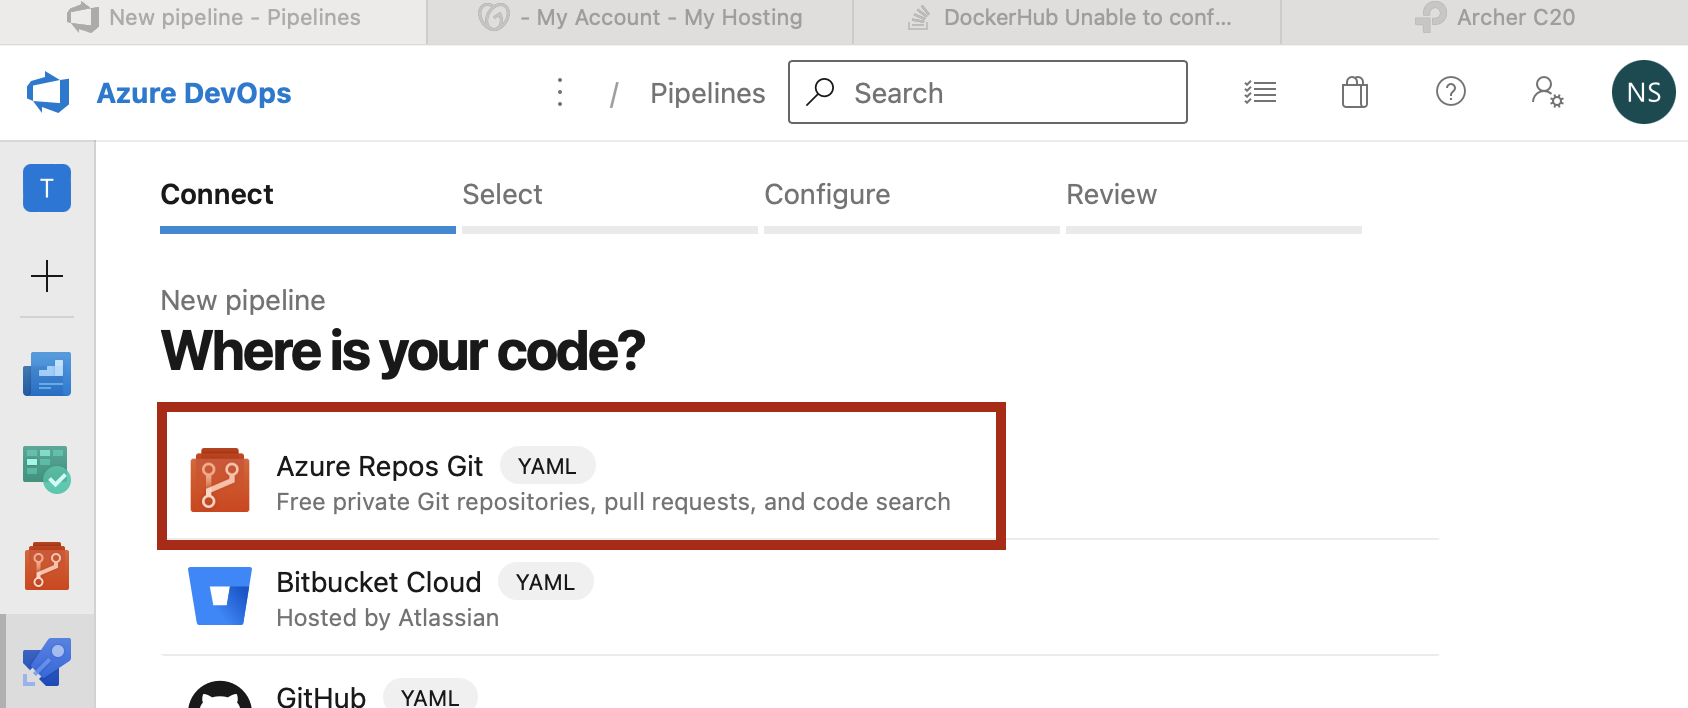
- Select repository

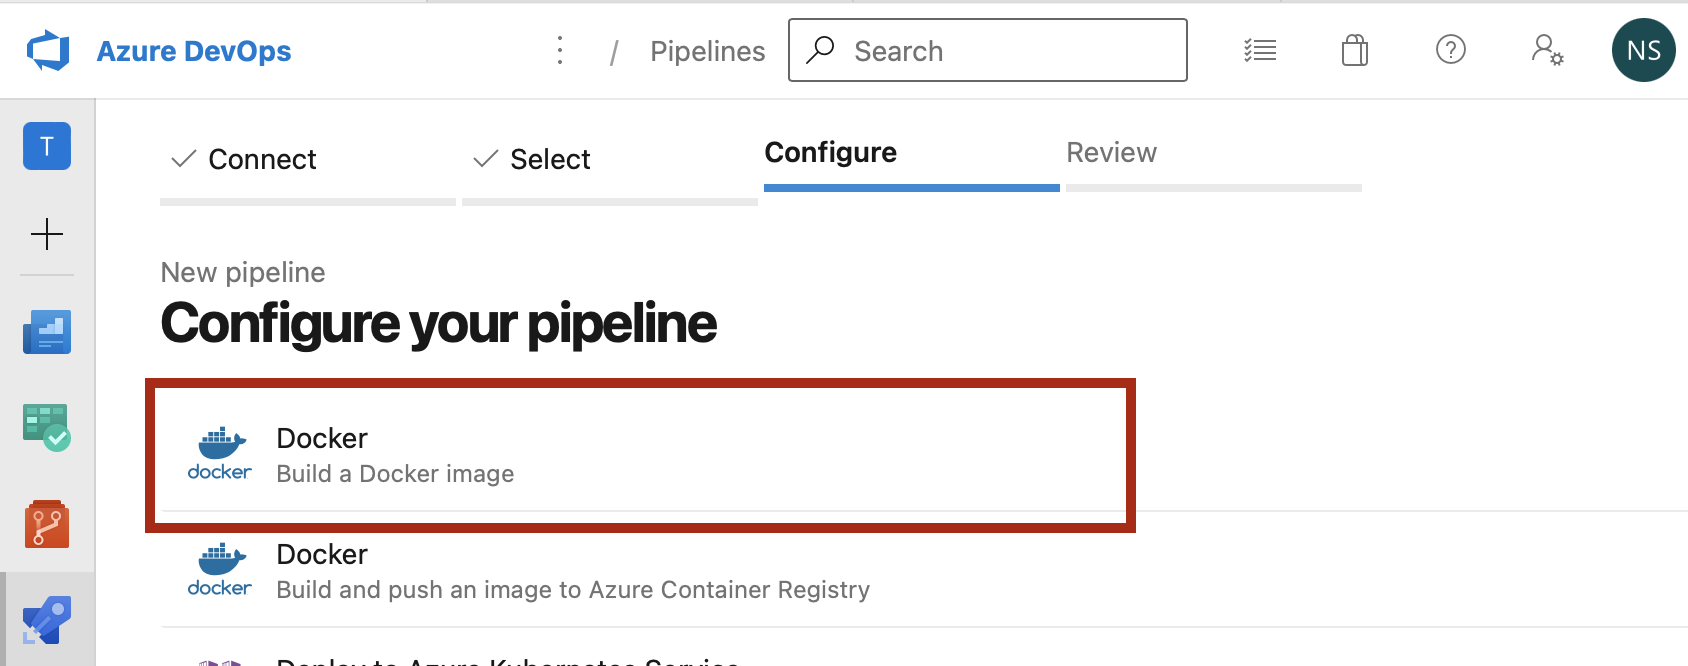
- Selecting Repository will trigger Configuration section, when select Docker – Build a Docker image.
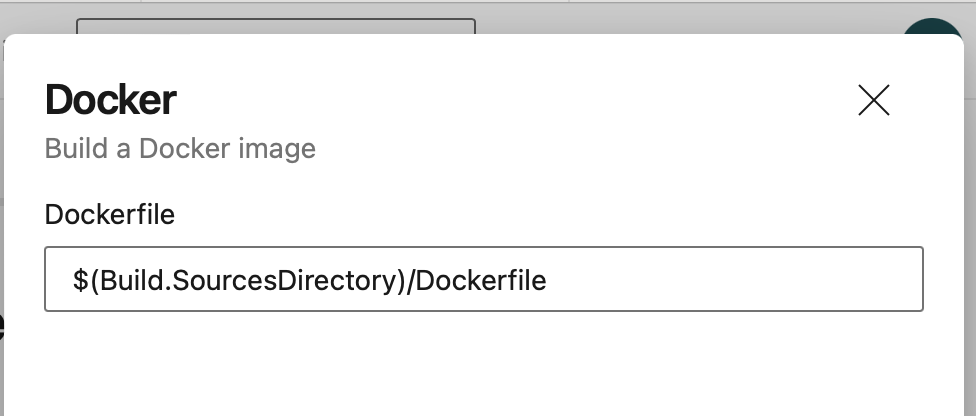
- It will look for Dockerfile in the repository, than click on Validate and configure button on popup.

- Next Step is “Review your pipeline YAML. It will show basic yaml which just build the image. It doesn’t push image to Docker Hub. We need some extra steps in order to be able to do push and pull in next step.
- In this file
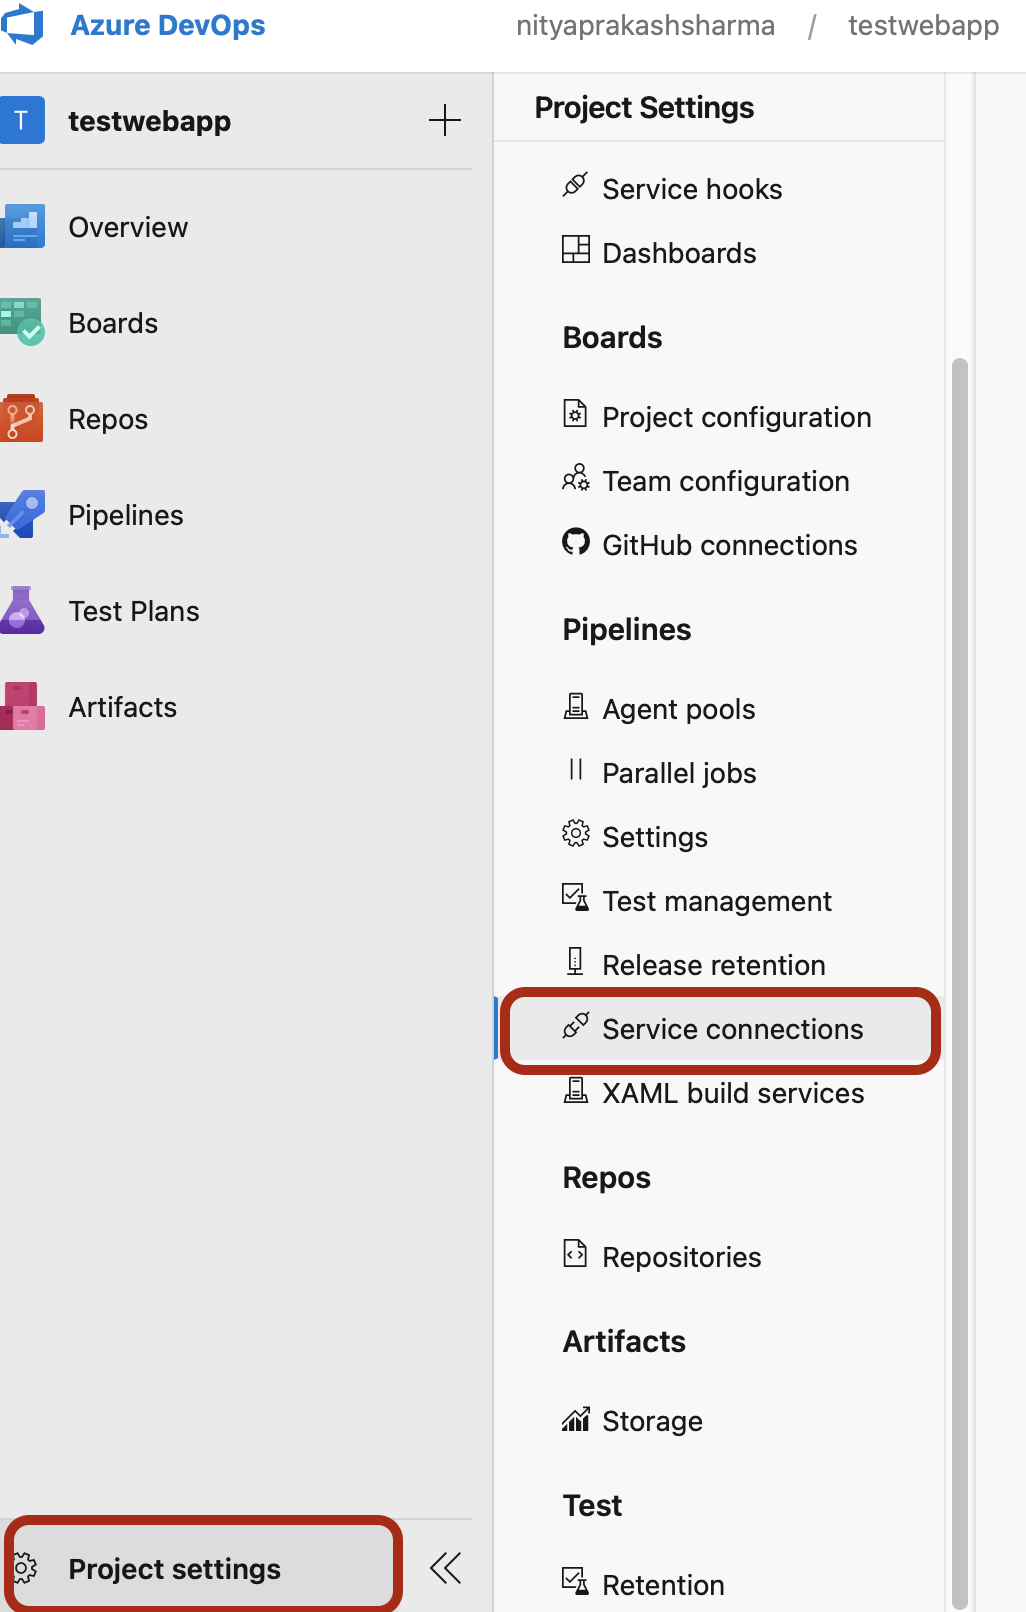
tagat line 12, I have mark it latest. It alway build as latest image. In next step it’ll it should be pushed to docker hub. In order to implement will another step. - Before we go next step we have create a Service Connection for docker. For this click on Project Setting in bottom of the page and select Service Connection as per the screenshot.
- Search for Docker and Select Docker Registry.
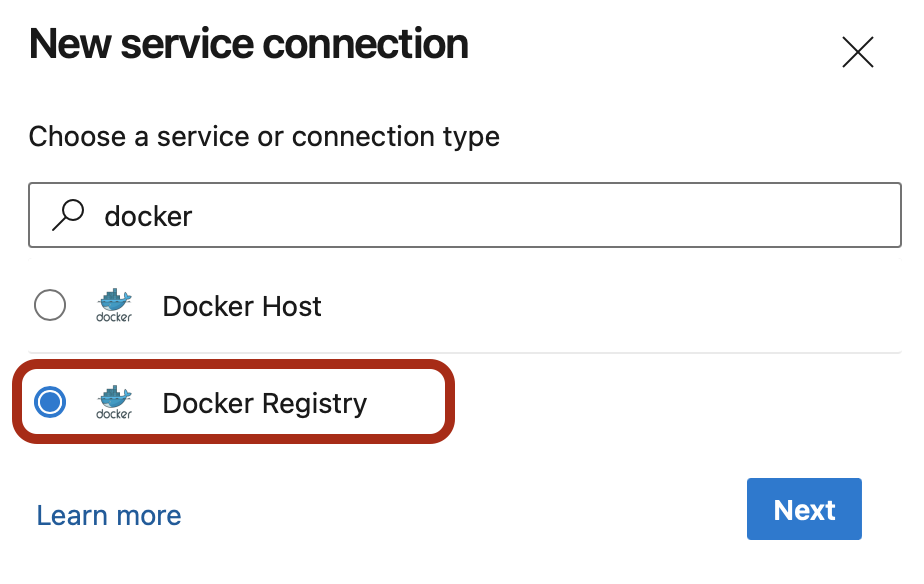
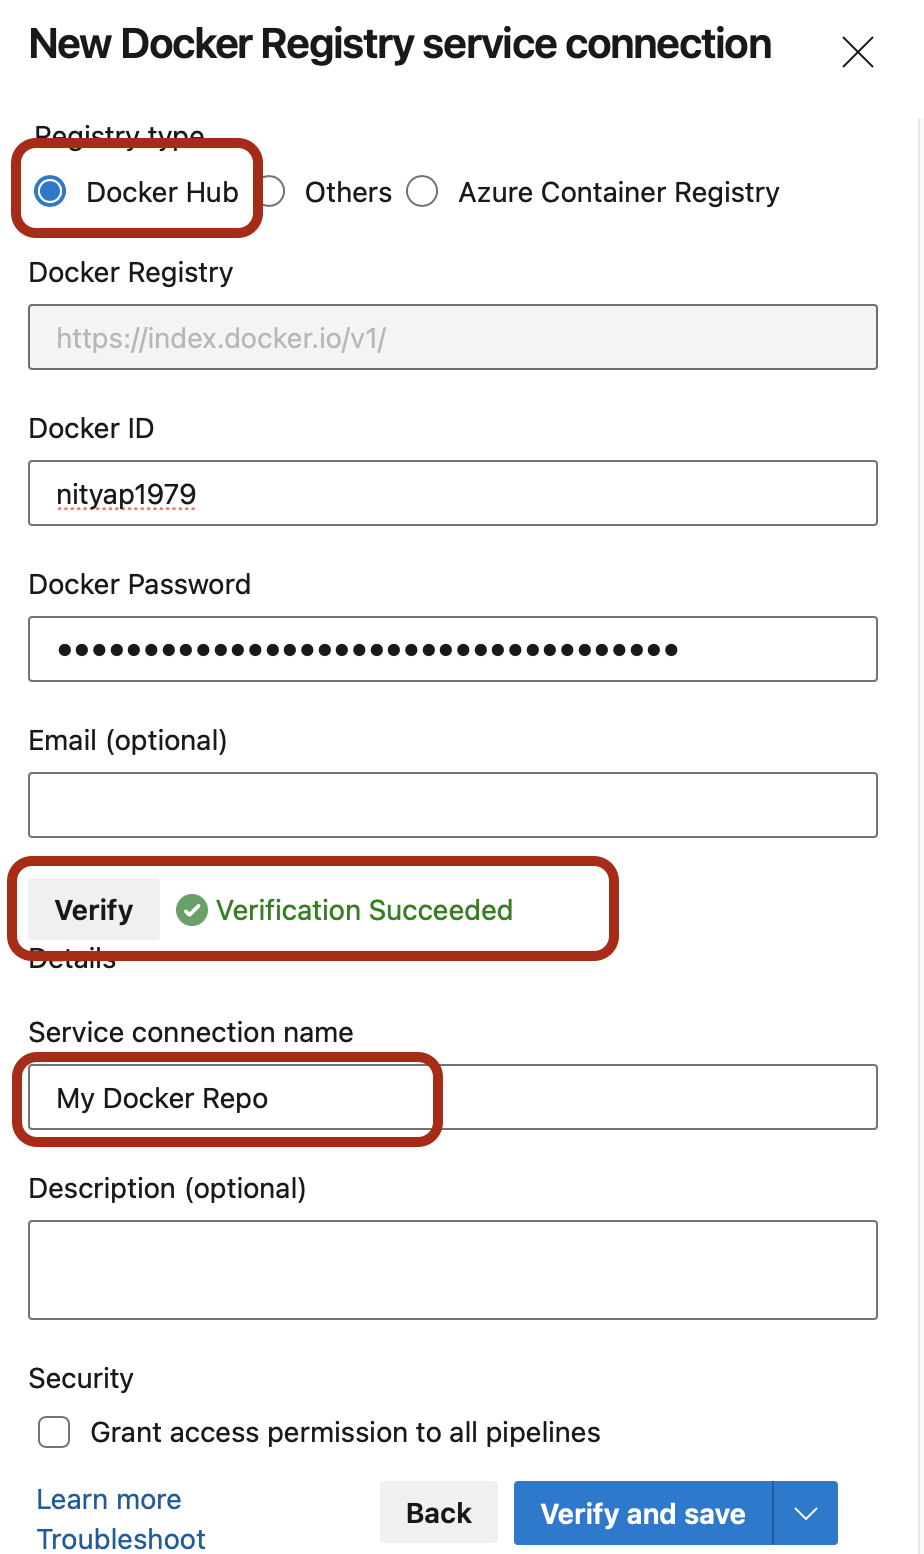
- Select Docker Hub from the option and provide your docker hub credentials. I was not able to use regular login password, instead I had to create personal access token (PAT) on docker hub and had to use that. Click on verify. Provide Service Connection name before saving it. This is going to be used for pushing the image to docker in next step.
- I have used
assistarto add push image option. Click on Show Assistar in right top corner of the yaml file page.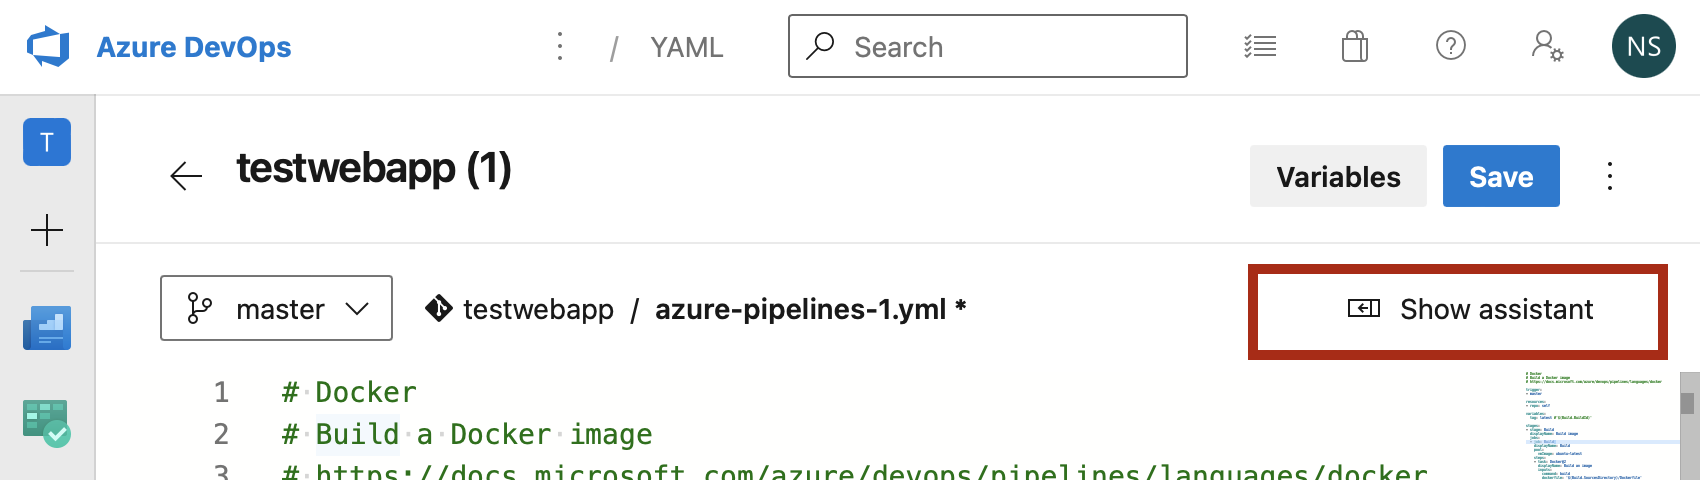
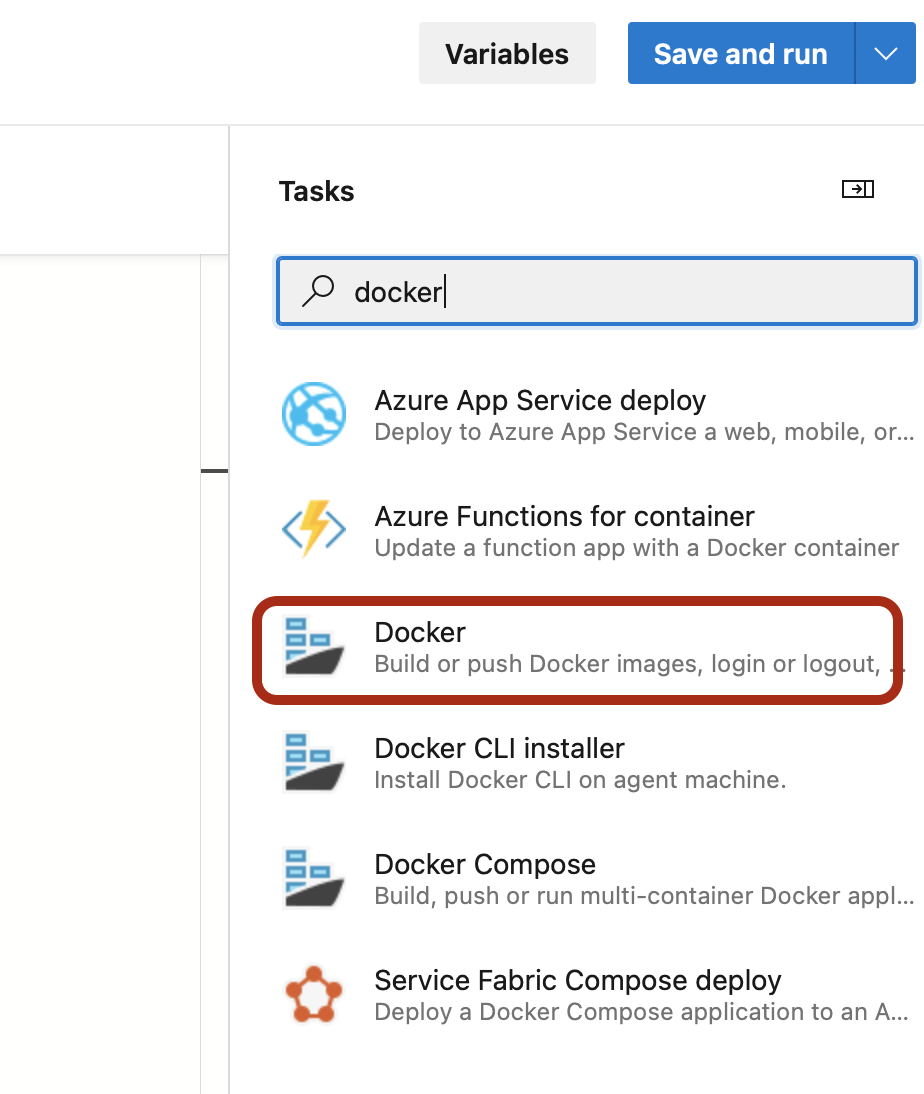
- Search for task “docker” and select “Docker -Build or push Docker Images
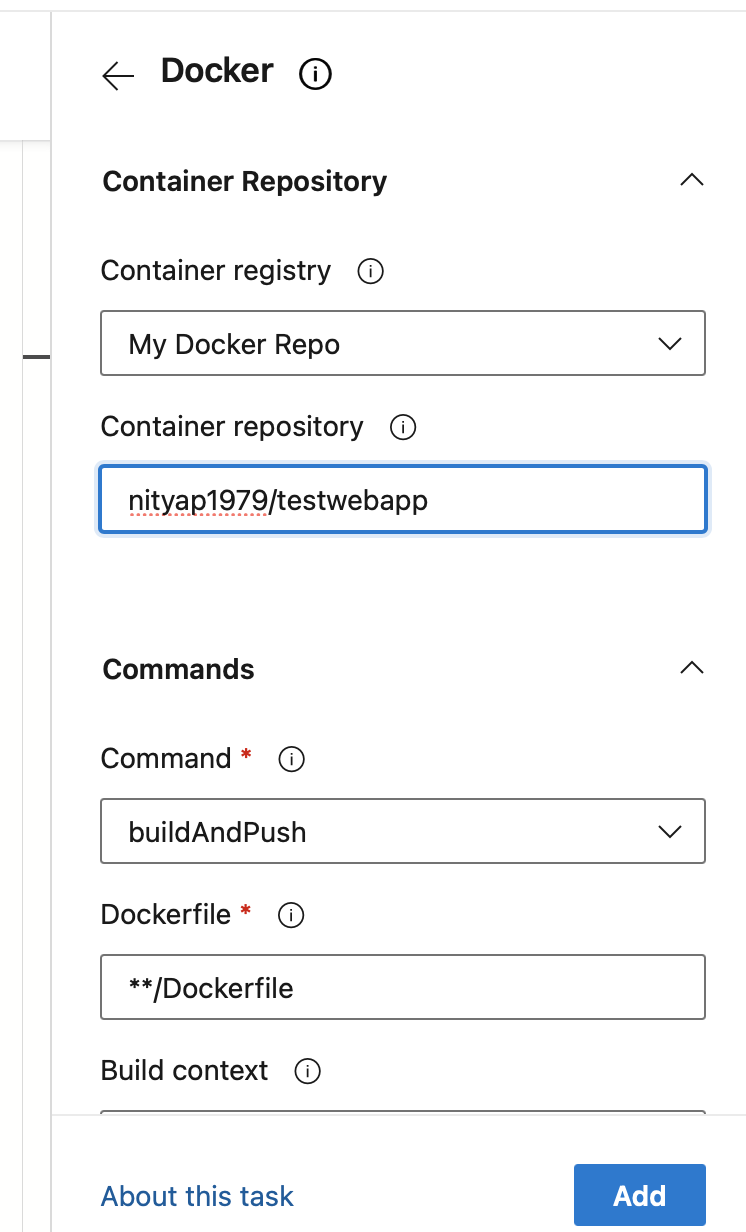
- Select Container Registry we created earlier in Service Connection. Provide container registry from docker hub and select buildAndPush option.
- Below is complete pipeline to yaml file will looks like. I added
tagin order to provide my own tag. Otherwise it will by default build and push with build id.
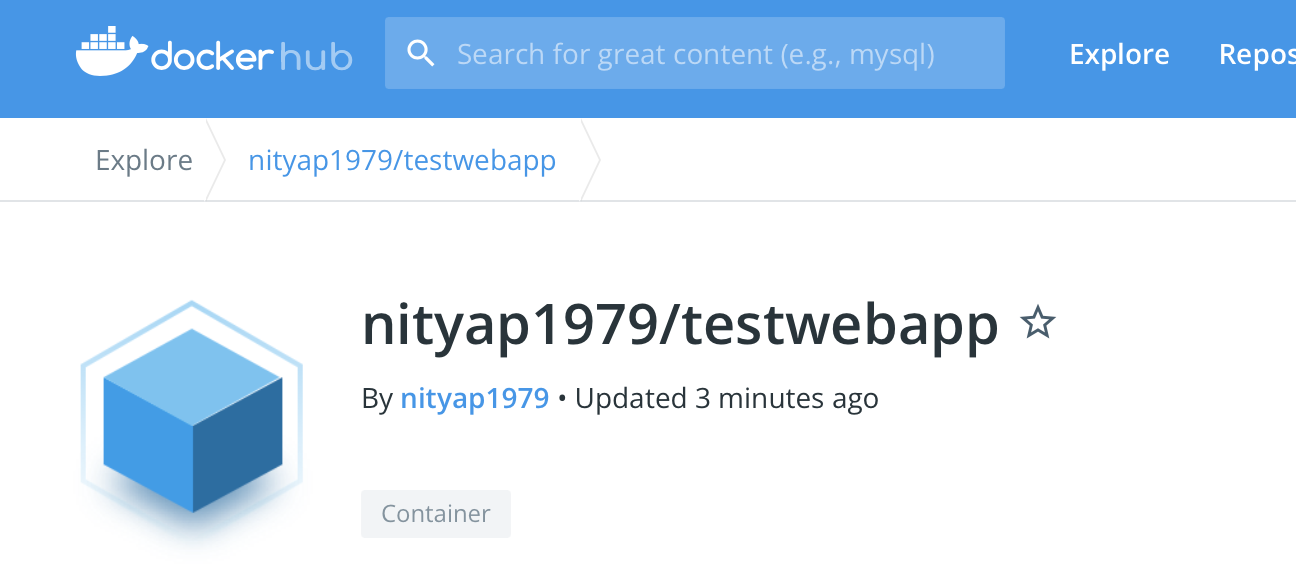
- Our build Pipeline is ready, just run it. If you didn’t grant permission when creating service connection. It’ll ask for permission and run the build. It has completed build and push in 1 minutes and 6 seconds. See screenshots below for build and docker hub.

Release Pipeline to deploy on Raspberry Pi
So far everything is online so we were able to publish to docker hub. According to my requirement, I wanted to deploy this image on local raspberry pi 4. So in this case our release pipeline must aware of raspberry. So there must be deployment agent running on Raspberry Pi. So below is the list of steps to configure release pipeline:
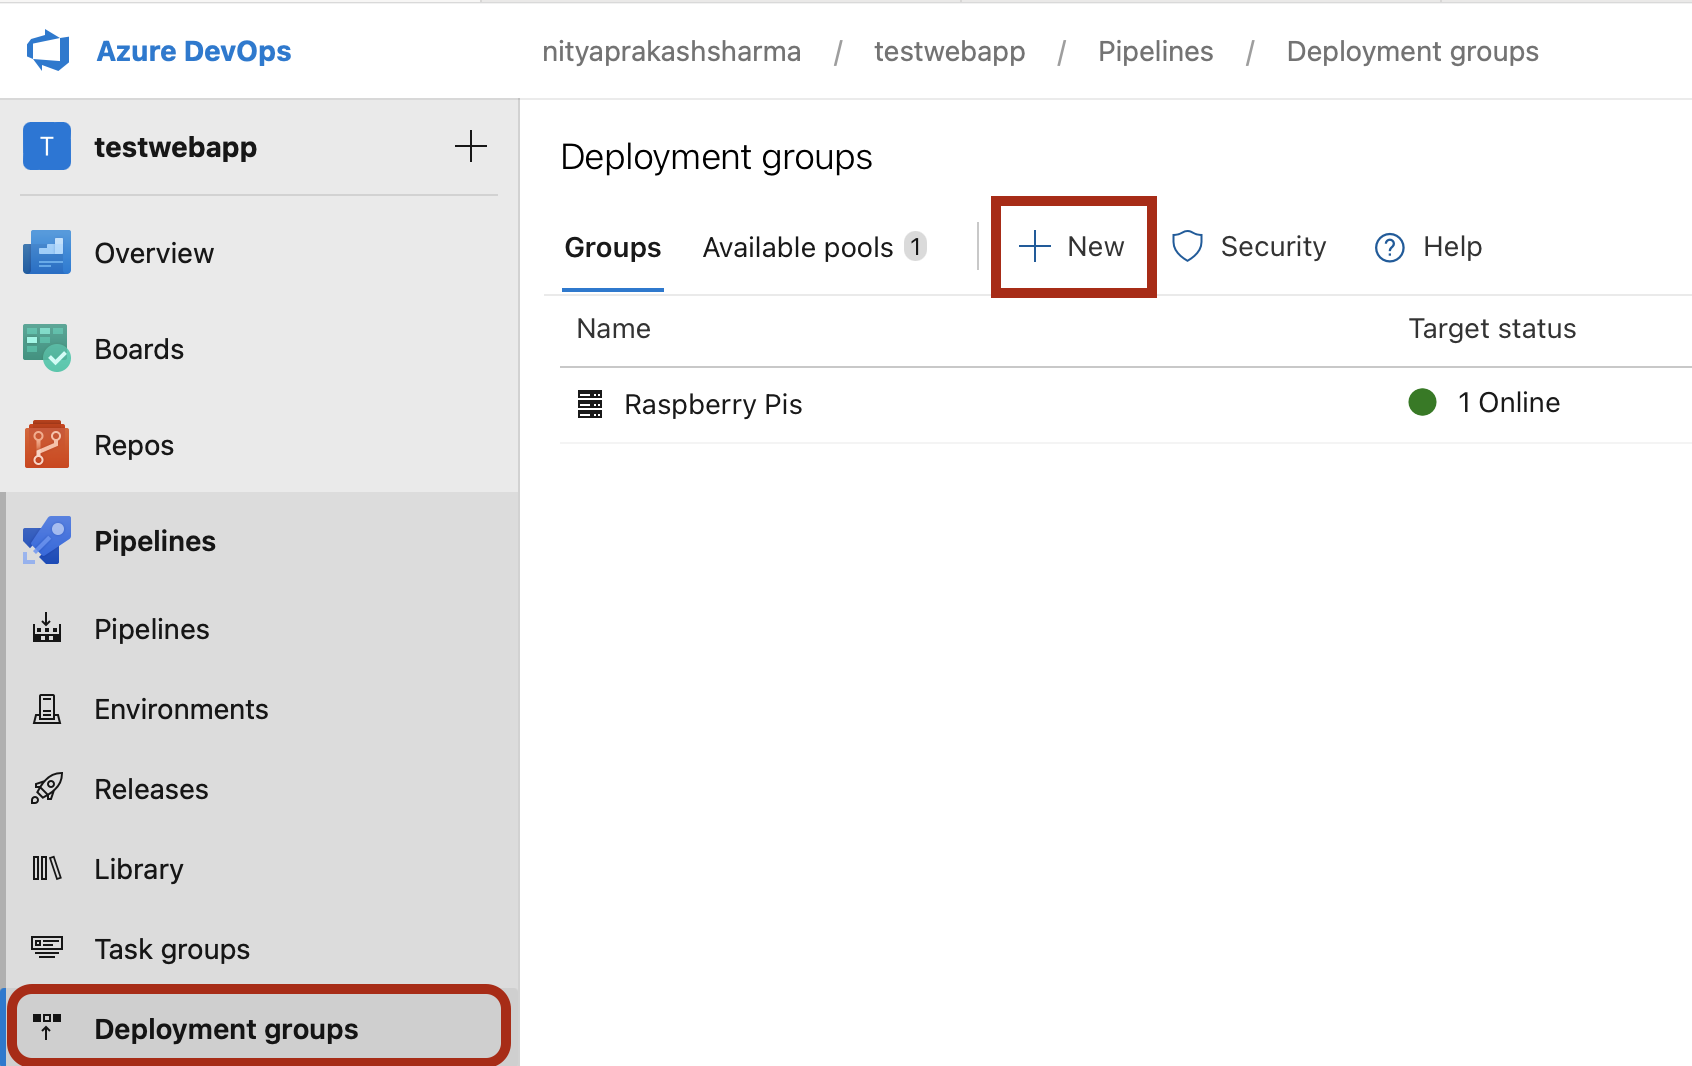
- Select Pipelines and select Deployment Groups and click on New:
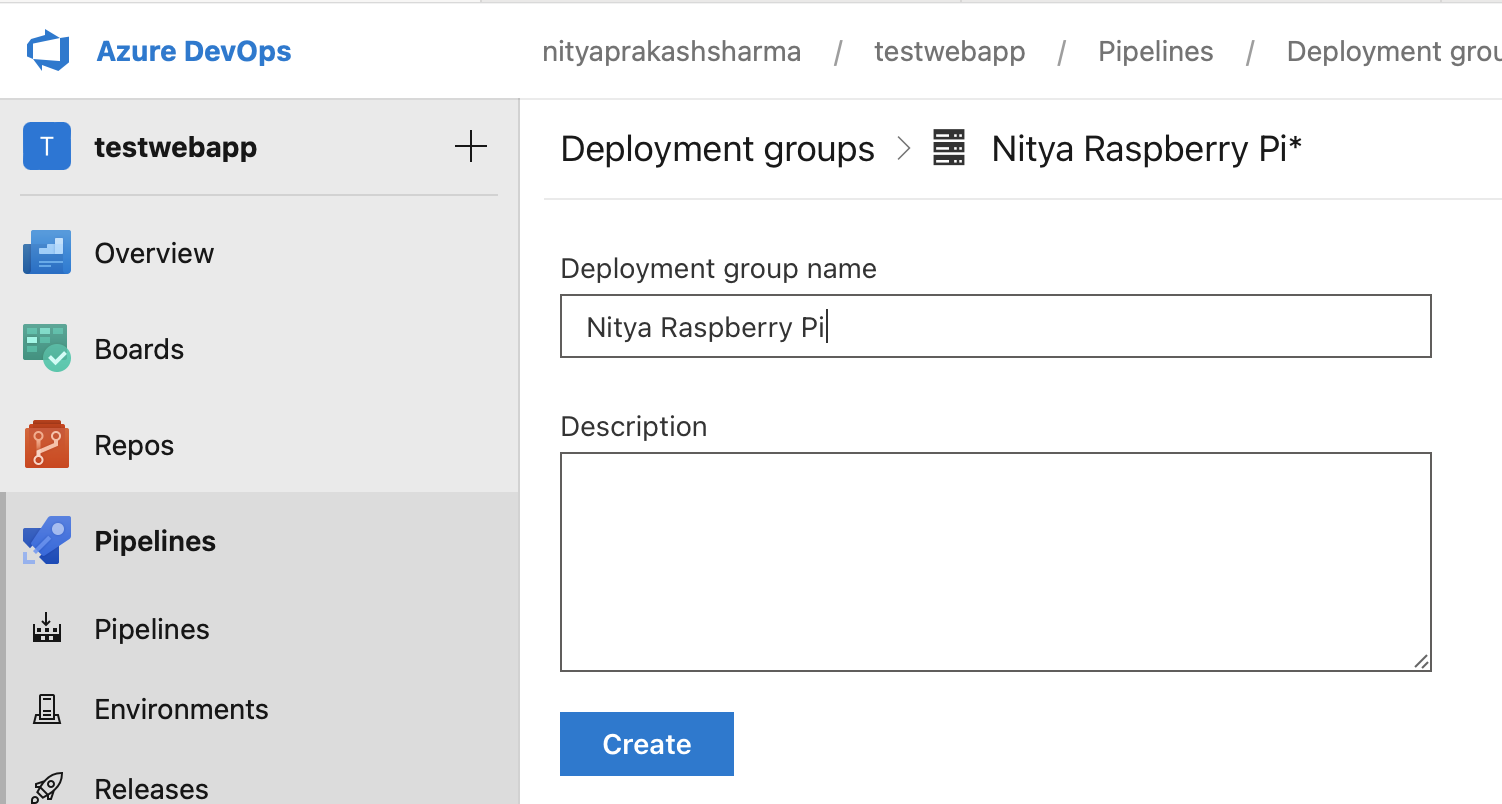
- Provide name of deployment group and click on create:
- Next screen will provide the scripts which needs to run on raspberry pi. We have to select Linux from Type of target to register drop down.
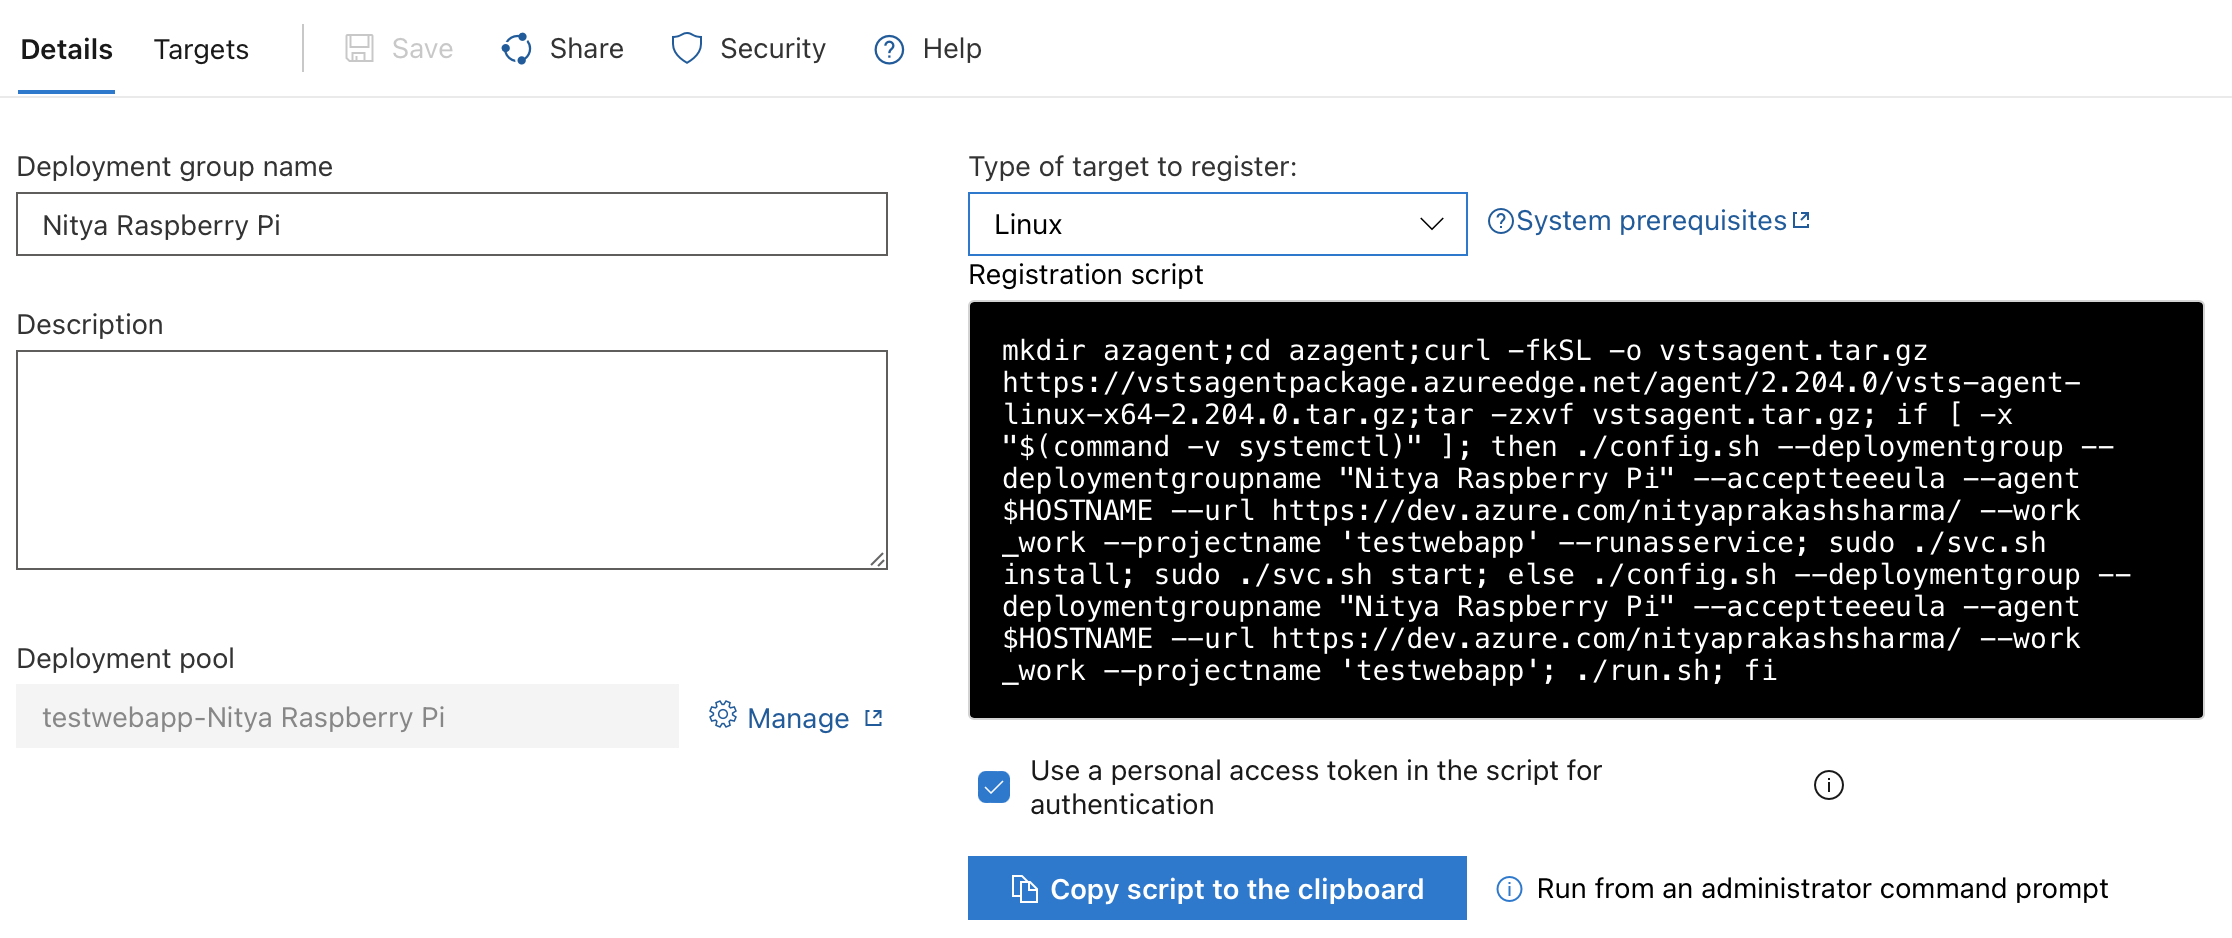
Above script is specific to x86 machine, It won’t work as it is on Raspberry pi 4, because Raspberry pi4 is ARM based. We have to replace this line https://vstsagentpackage.azureedge.net/agent/2.204.0/vsts-agent-linux-x64-2.204.0.tar.gz with https://vstsagentpackage.azureedge.net/agent/2.204.0/vsts-agent-linux-arm64-2.204.0.tar.gz. I have replaced with arm64 because I have Ubuntu 21.10 64 bit version installed.
Run this script on your home directory of Raspberry Pi 4. It’ll ask for Enter Deployment group tags for agent. Put something you can identify with. Remember, this is critical as this tag is important to run the release process. In my case I used “Pi4 Deploy”. - Once agent configuration done, come back to azure dev ops pipeline screen and go to Deployment groups. If your agent successfully configured, it will show status online.

- As it is my personal project, I wanted this release pipeline to trigger automatically as soon as image is pushed to Docker Hub. So for this follow next step.
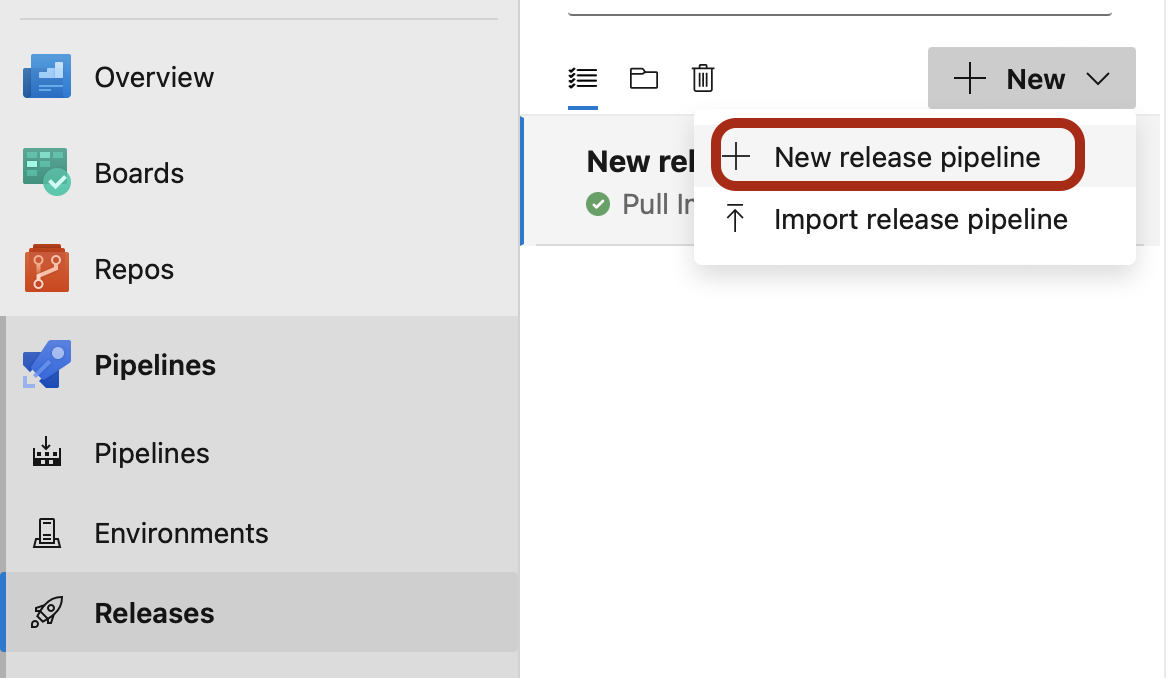
- Create new Pipeline from top of the pipeline screen and click on New Release Pipeline.
- Click on Artifacts button and it will open a blade in the right side. Select docker hub and select Service Connection created previously. It’ll ask of there information mentioned in below screenshot. When I was trying to save, getting below error
DockerHub Unable to configure a webhook on the selected Docker Hub repository.. DockerHub returned the error 'Forbidden'. So auto triggering when docker image pushed to docker hub not going to work. Instead, I would use it when manually triggering job for production release. Skip to next step if want to trigger it as soon as build pipeline finish.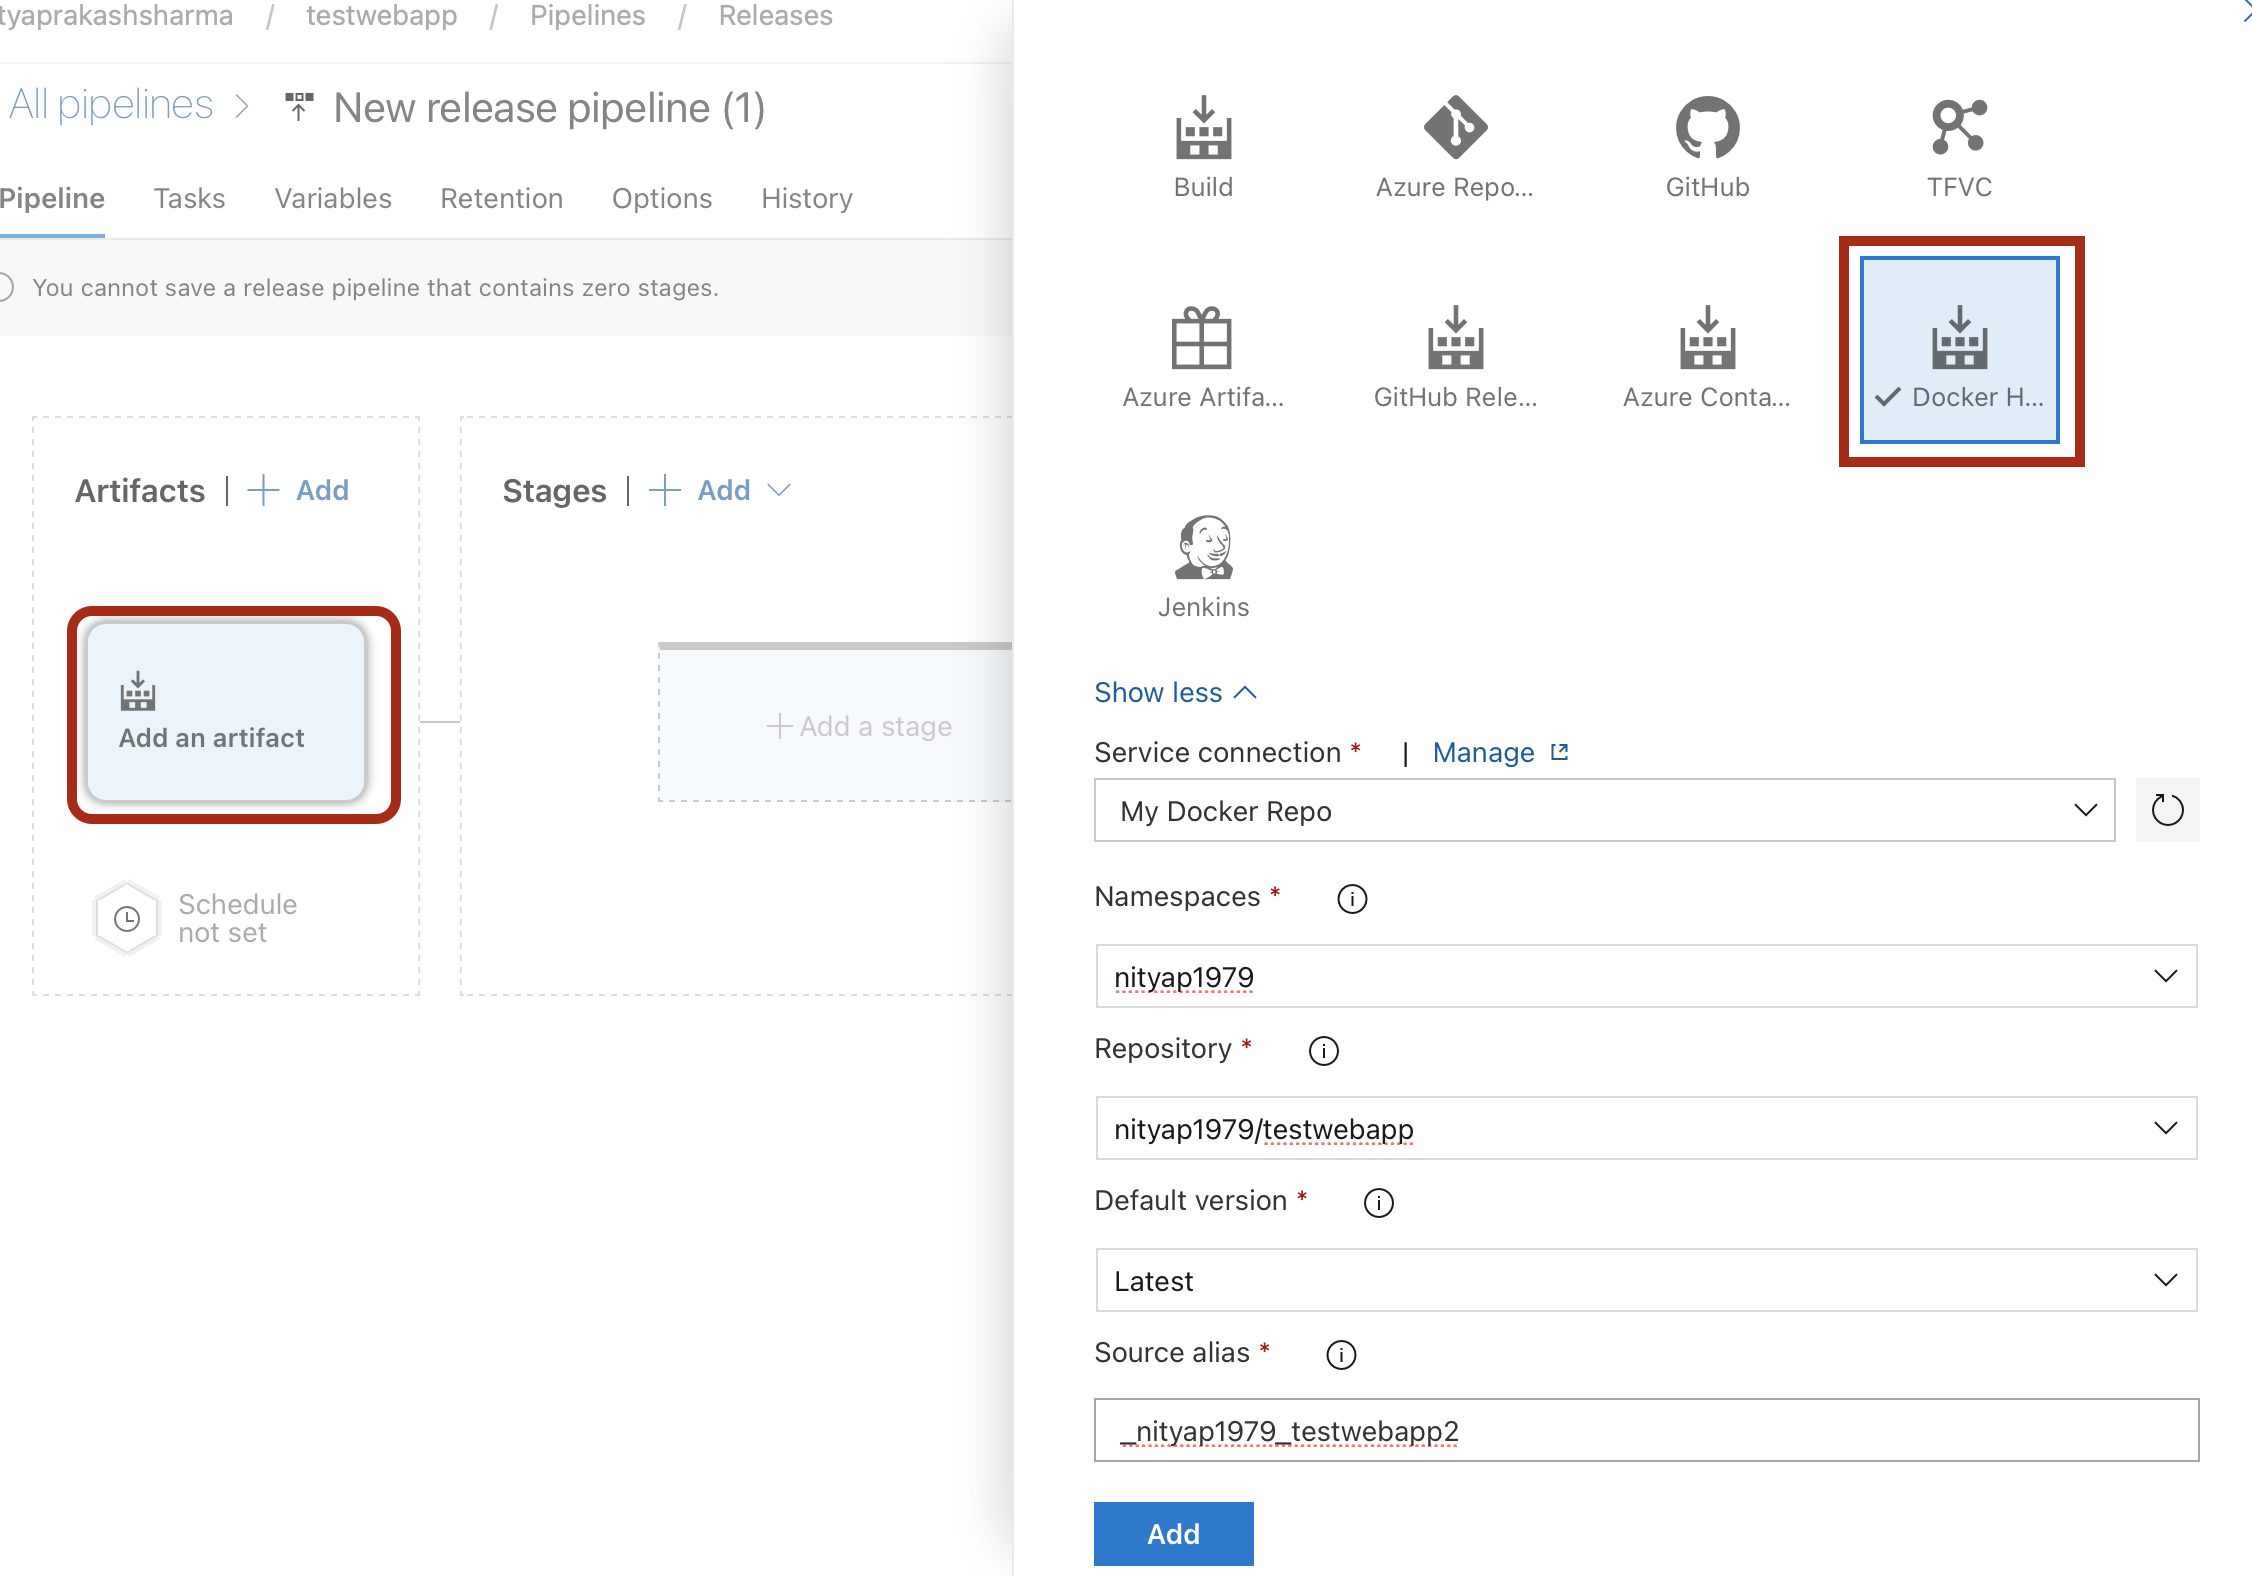
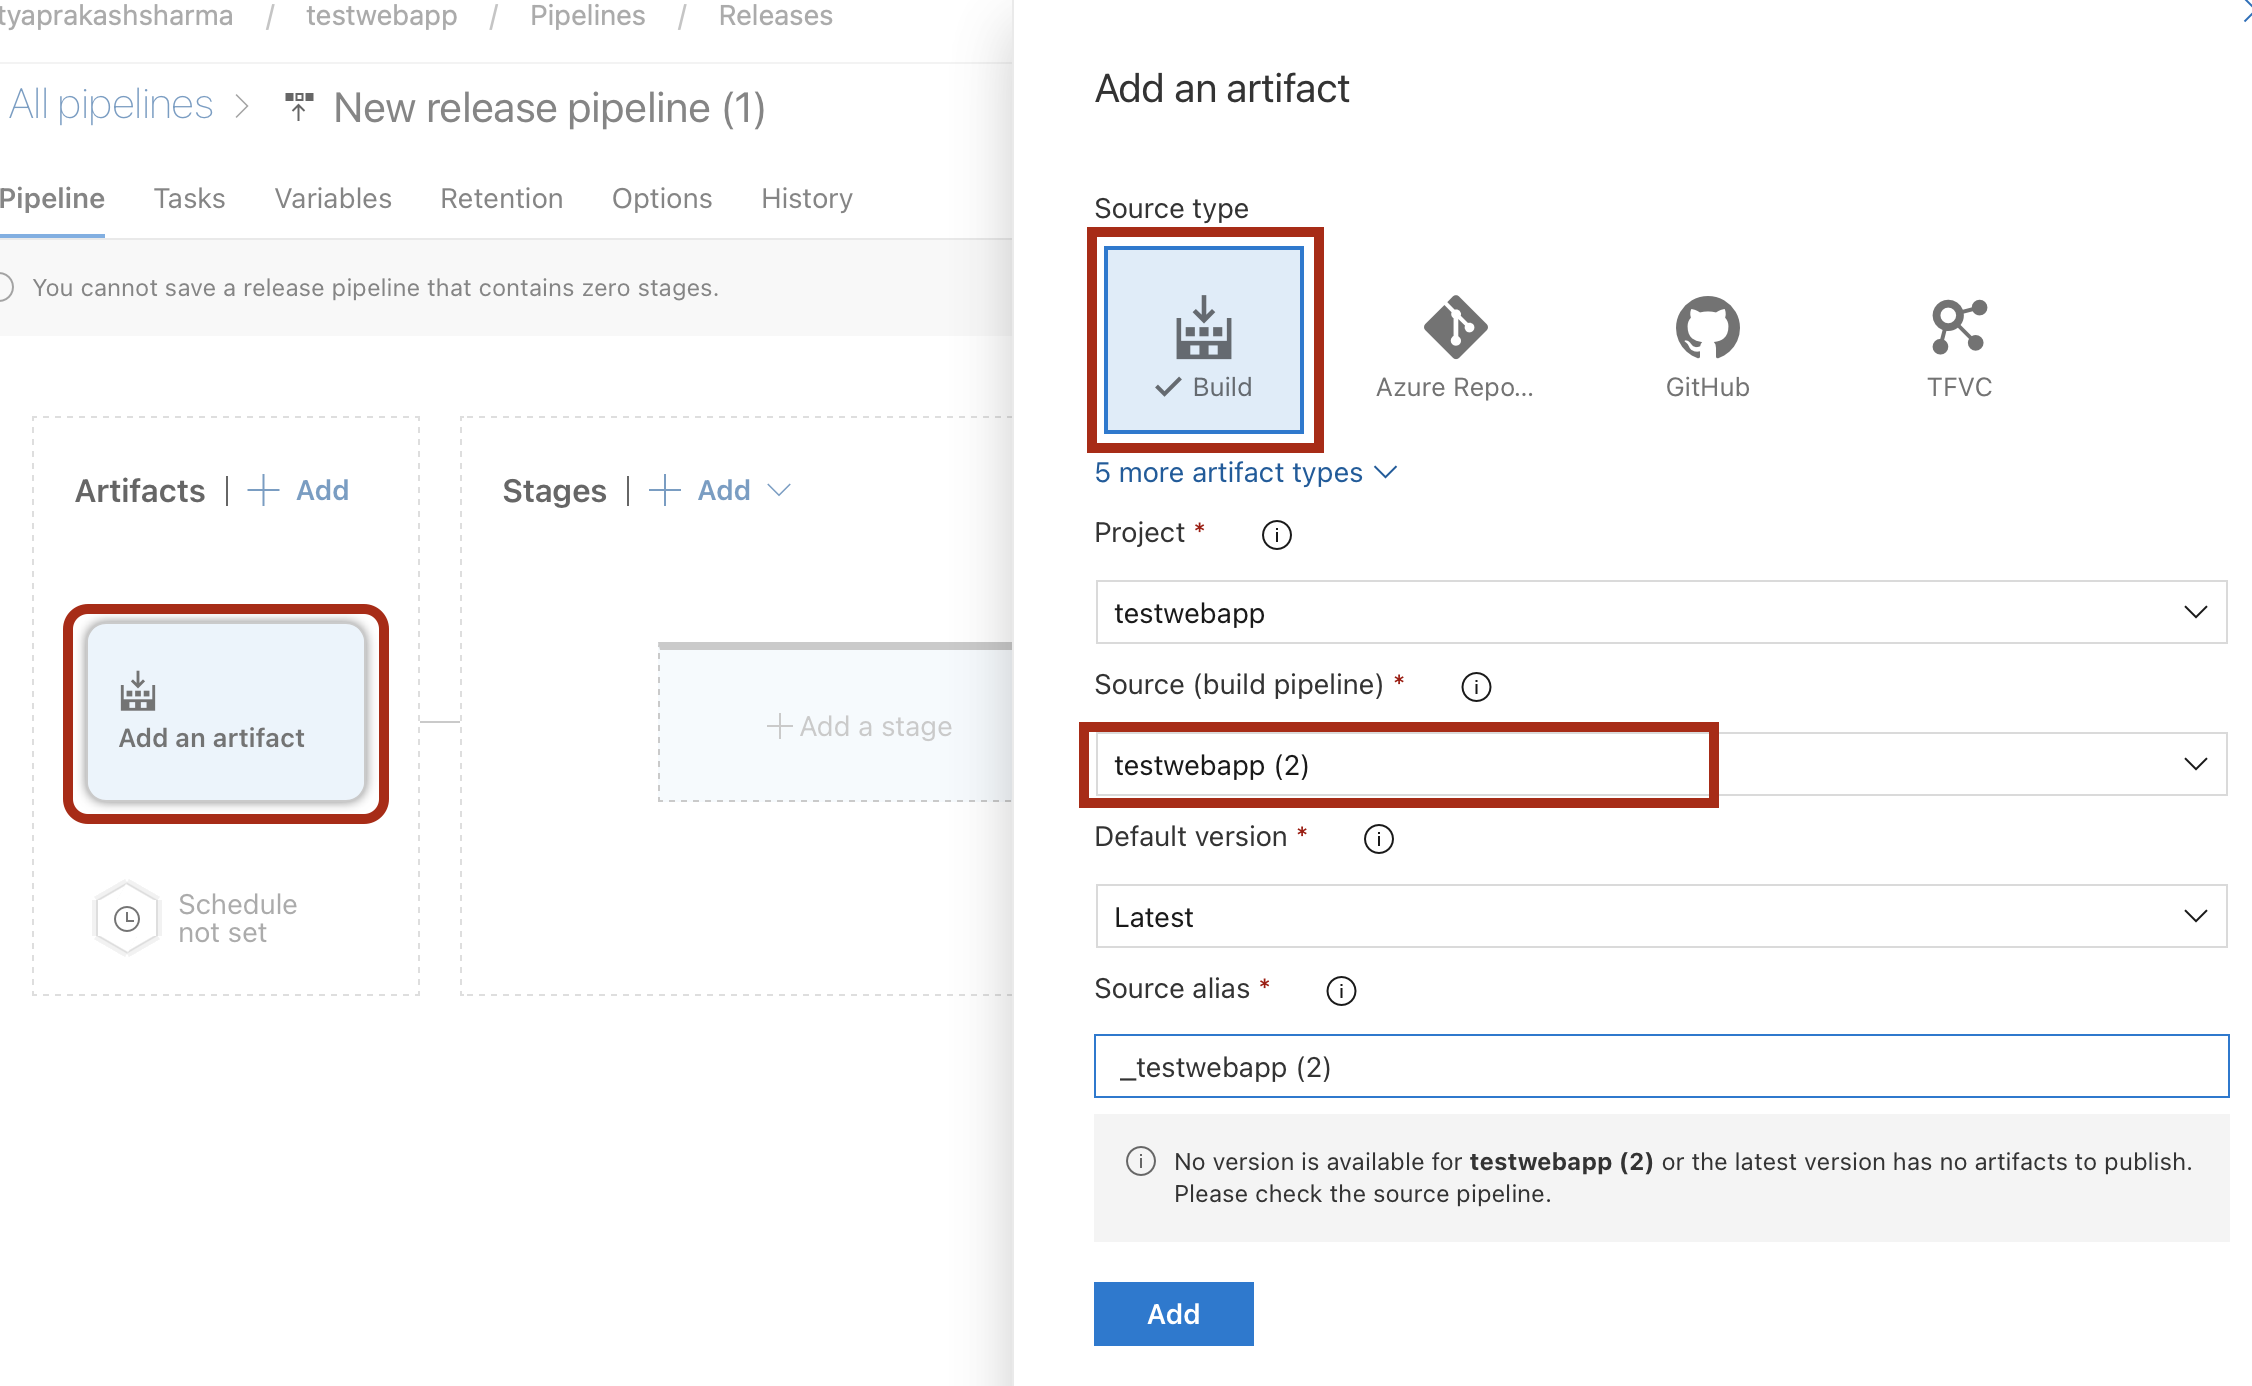
- Click on Add an artifact and select Build option from left and select build pipeline and tag, and click on Add.
- Once Artifact added we will set trigger to start release as soon as new build is available. Click on trigger icon on Artifact button and enable Continuous deployment trigger

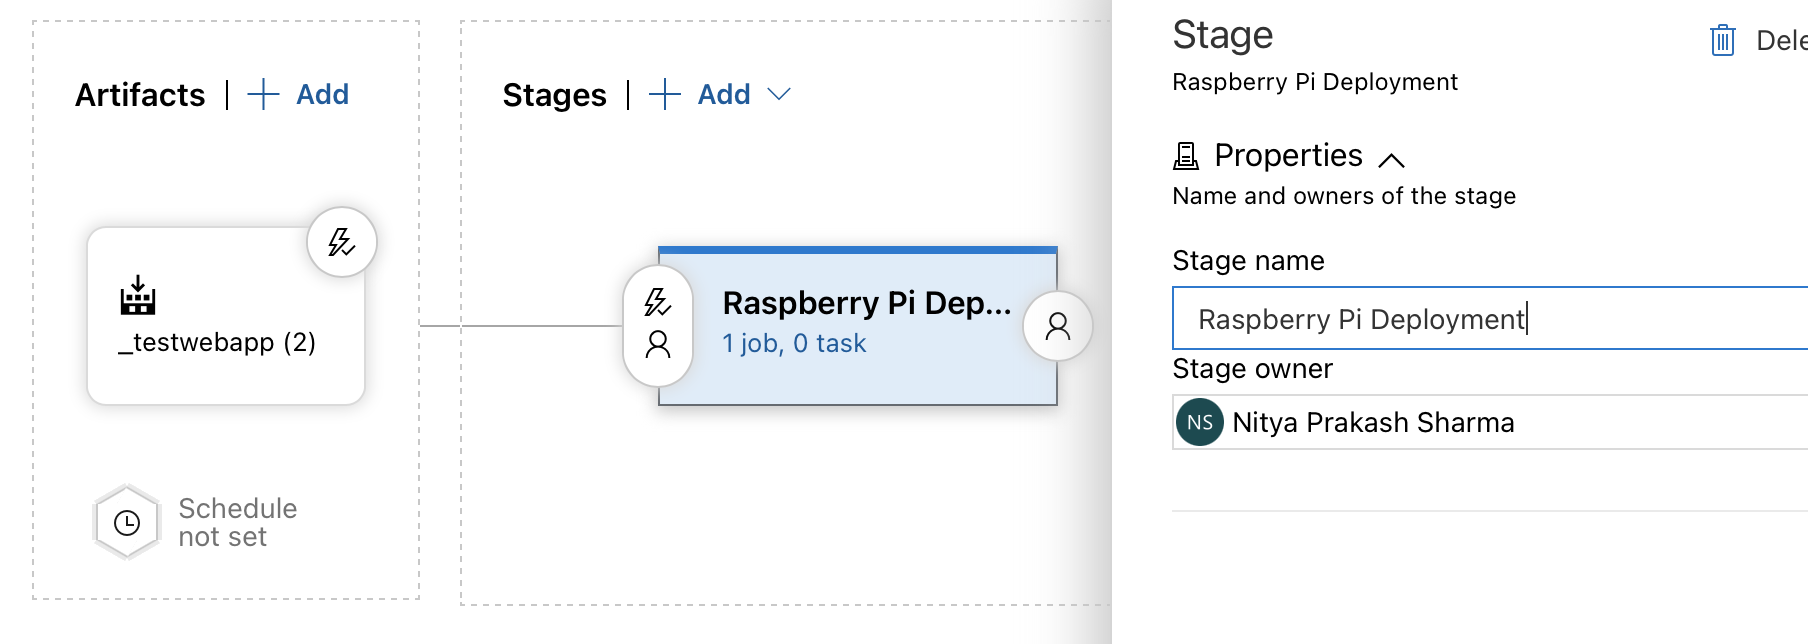
- Now we will Create add another stage and tasks to that stages. Click on Add a Stage and Give a name like “Raspberry Pi Deployment”:
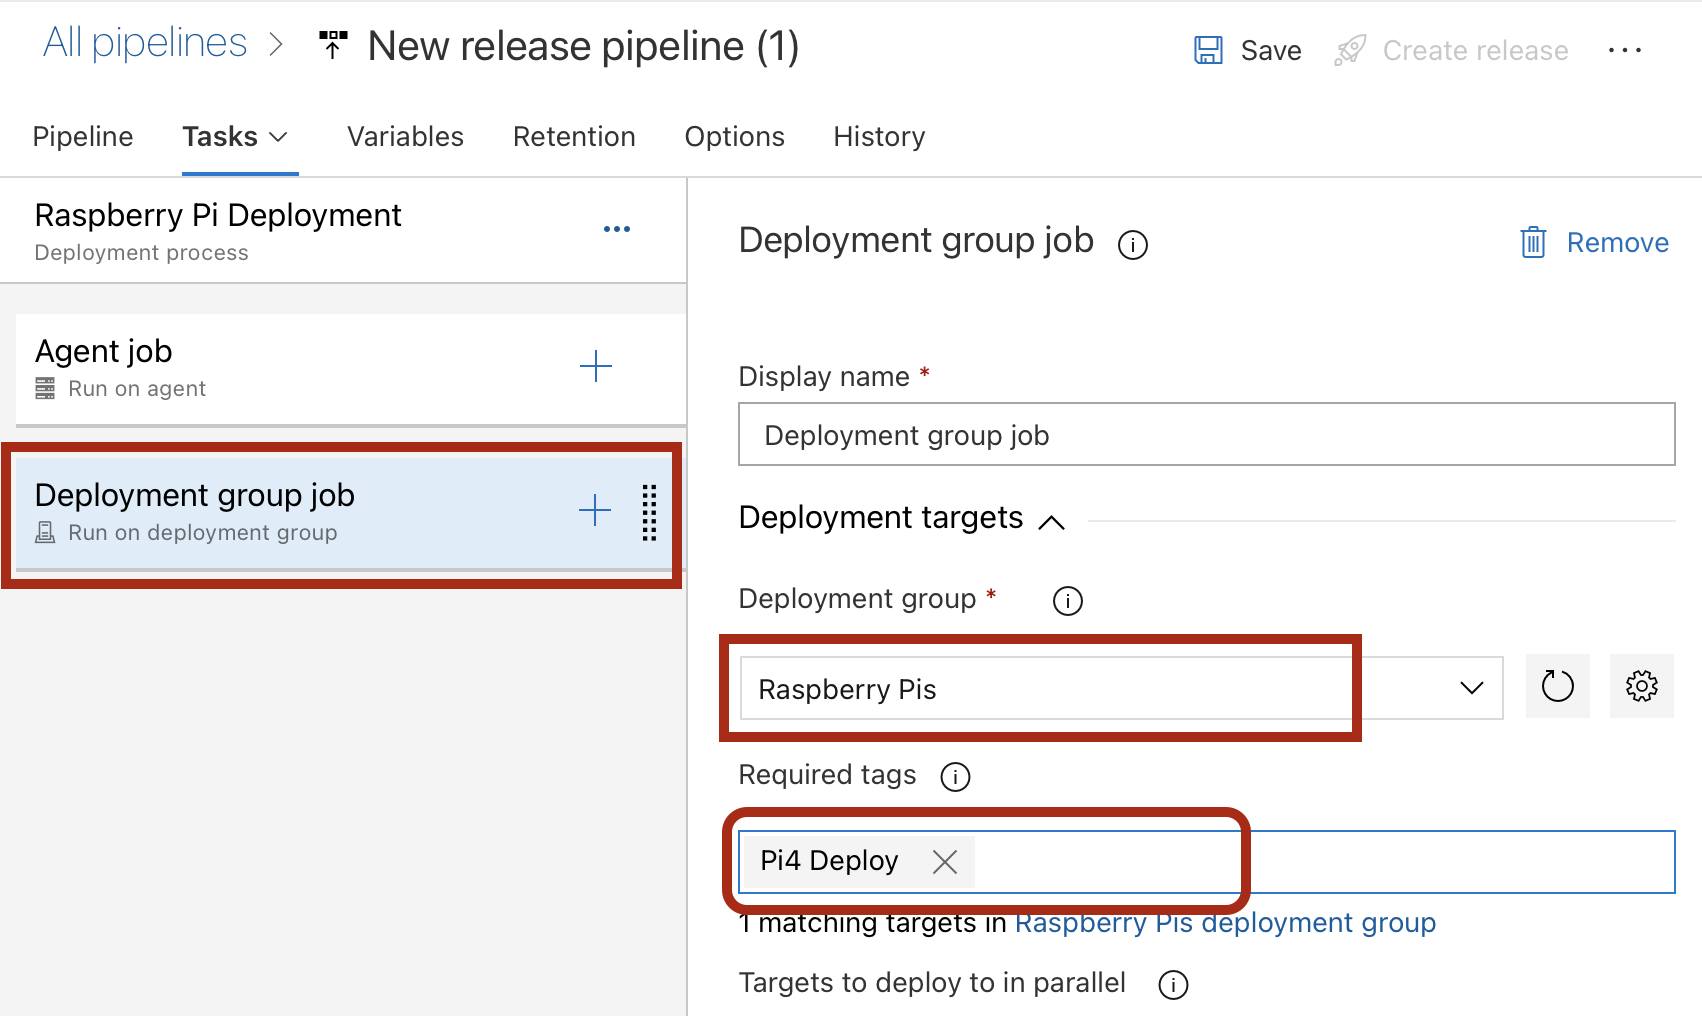
- Click on Tasks and it will take you to the Raspberry Pi Depoyment job. Click on context menu of the job and select Deployment Group Job. Remove default “Agent Job” tab. Configure Deployment Group Job as per the screenshoot below. Select Deployment job we created. We also have to enter the Required Tags. It will value which we provided when configuring agent on our Raspberry Pi. If exact same value not provide, agent will not deploy the commands.
- Click on + icon on the Deployment group job and search and select Command Line Script and click Add.
First command will be logging to the docker hub. As per the screenshot below we have three Command Line Scripts as tasks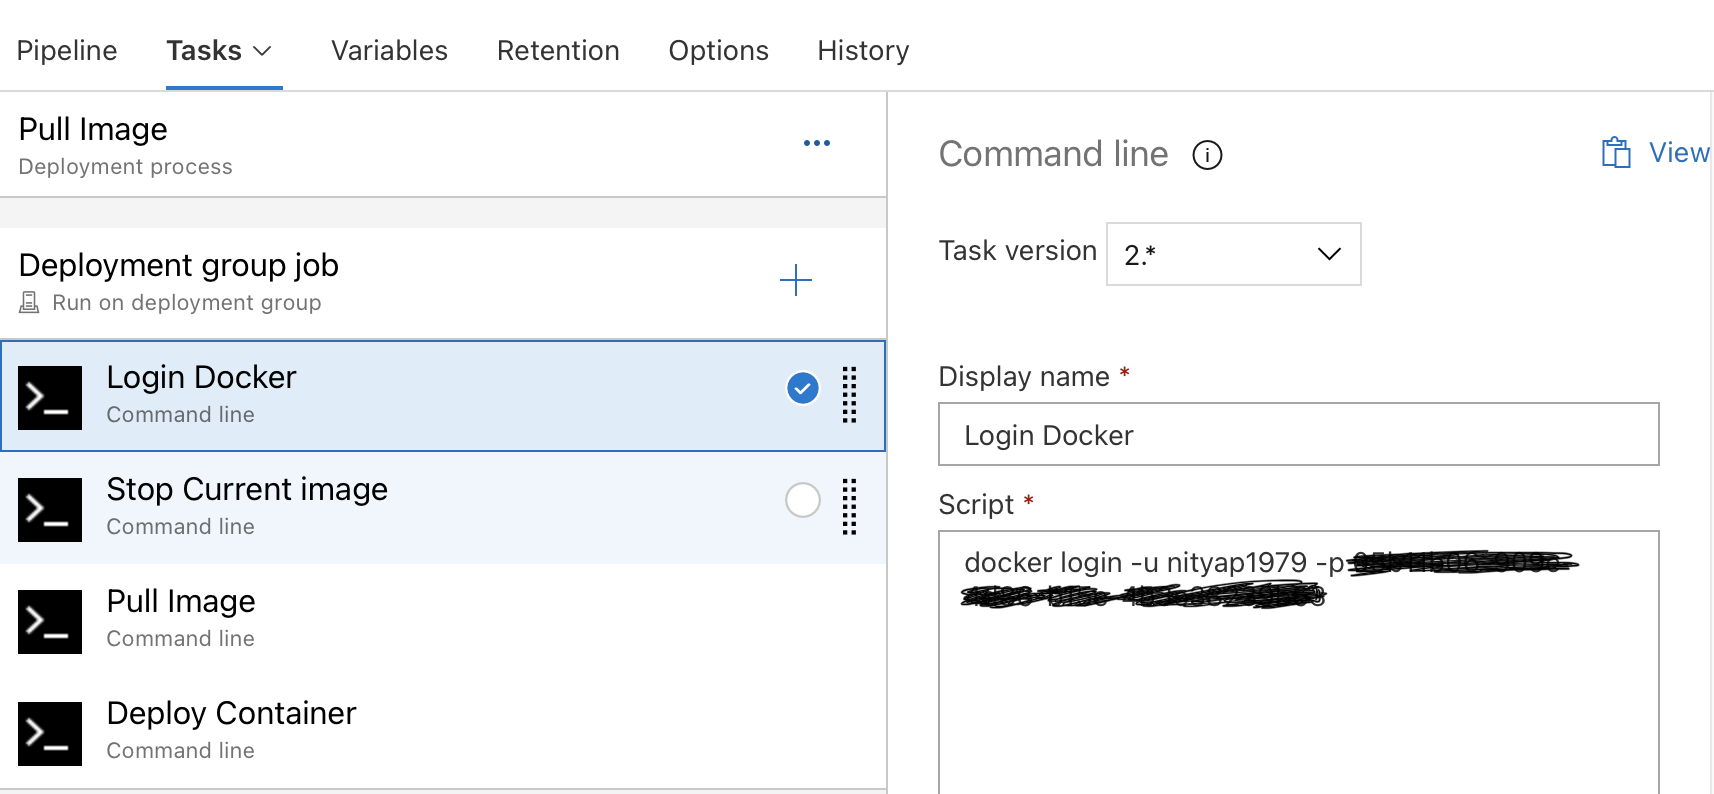
- Login Docker => docker login -u <userid> -p <password>
- Stop Current Image => docker stop $(docker ps -q –filter ancestor=nityap1979/testwebapp )
We need to stop current container, above command give the list of images with testwebapp and stop the image. - Pull Image => docker pull nityap1979/testwebapp:latest
- Deploy Container => docker run -d -p5000:80 nityap1979/testwebapp:latest
- Save the pipeline.
Note: before we run the release pipeline. Docker installed and configured on Raspberry pi 4. In previous article we already gone through how to setup.
Wrapping Up
My intention of creating this article to automate deploying my home grown application to deploy in Raspberry Pi 4. This is not the pipeline, you would use in production. Even though in production we will be adding some approval process or some thing like that. I am not going to cover anything.